Challenge Objectives:
- Launch EC2
- Update Security Groups
- Resize Instance Type and EBS Volume
- Test Termination Protection
Launching EC2
Objective:
- This hands-on exercise is designed to familiarize you with the Launching, Resizing, and terminating an EC2 instances.
- To learn how to use the AWS console and its services.
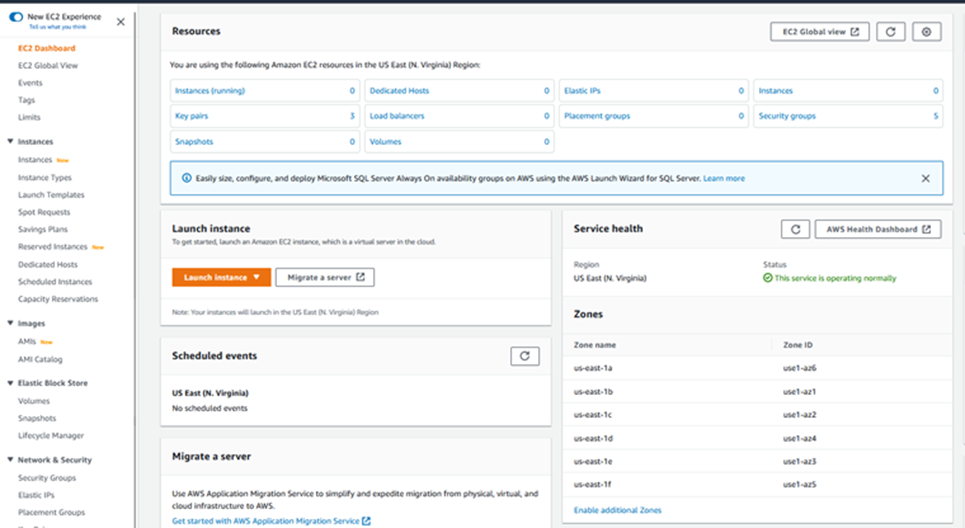
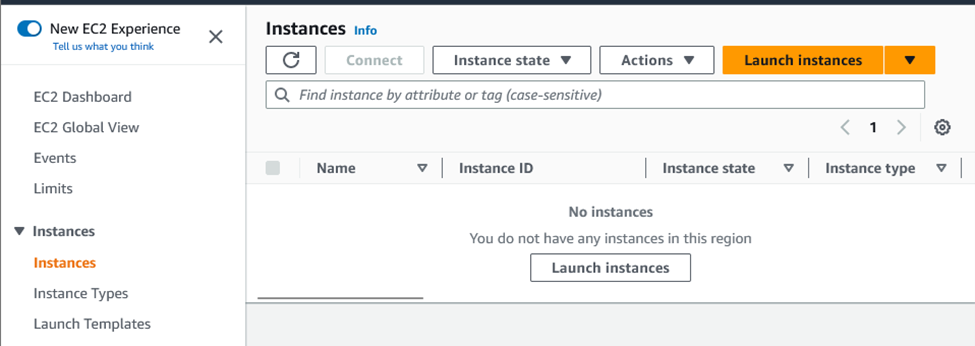
Task 1: Launch an EC2 instance.
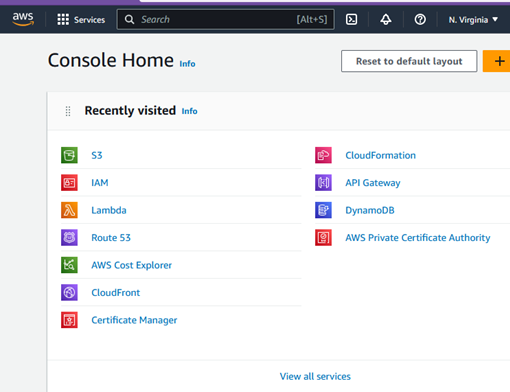
- Log in to the AWS management console
- Go to Compute Services and click on EC2. Then, EC2 -> Instances
- Click on "Launch Instance".
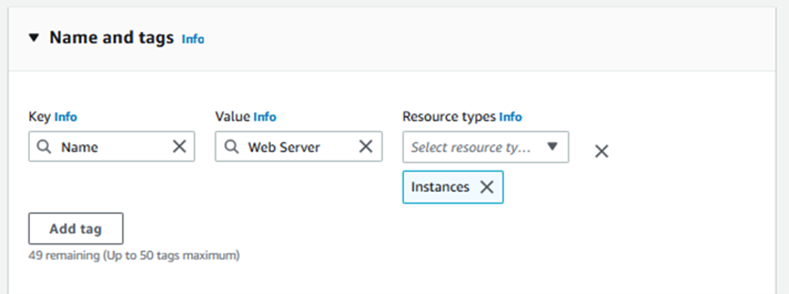
- Name the instance type: Web Server.
- Click on Additional Tags. Configure tags:
- Key: Name
- Value: Web Server
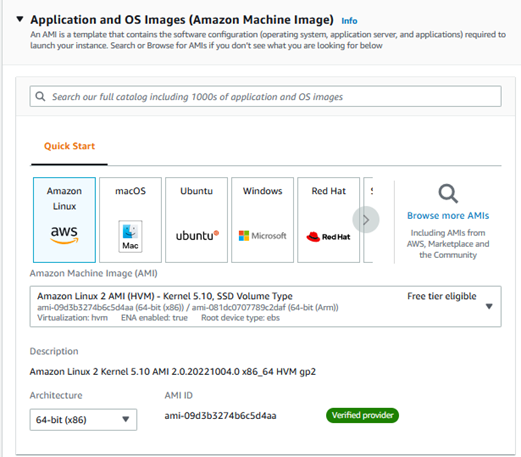
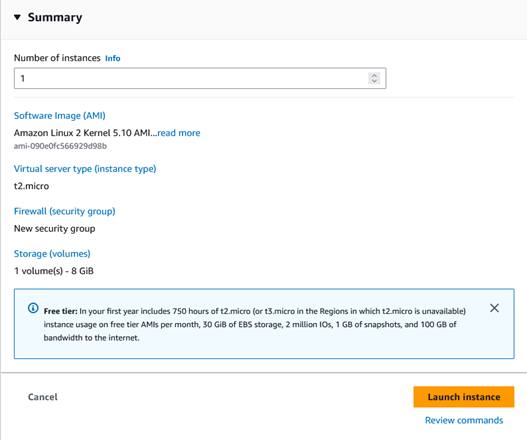
- Choose an AMI: Select "Amazon Linux 2 AMI" under Application and OS Images. Make sure it is free tier eligible.
- Choosing an Instance type: Select t2.micro instance. Make sure it is pointed to "free tier eligible".
- In key pair (login), Select Create a new key pair.
- Give the name of your choice for the key pair (examplekey).
- Download the key pair.
- In Network Settings, edit and create a security group and keep the rest as default.
- Security group name: Web Server Security Group
- Description: Security Group for my Web Server
- Delete the existing SSH rule.
- In Configure Storage leave settings as default.
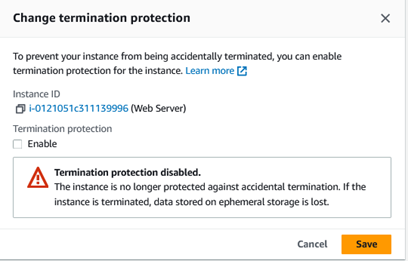
- In Advanced details, enable termination protection.
- Scroll down further in Advanced details to the User Data field. Copy
the following commands and paste
them in the User data field.
#!/bin/bash yum -y install httpd systemctl enable httpd systemctl start httpd echo '<html><h1>Hello From Your Web Server!</h1></html>' > /var/www/html/index.html - Under Summary click Launch Instance
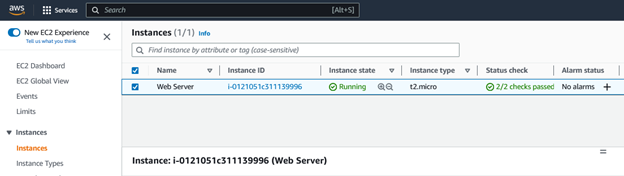
- The Instance will show as successfully initiated.
- Now, scroll down to click View Instance.
- Wait until the instance state changes from pending to running.
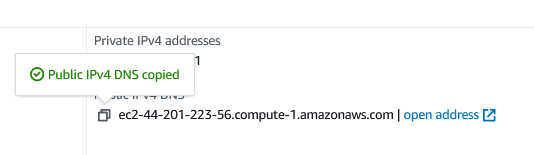
- In the Description panel below, observe the right column which has Public DNS received by the instance from the Internet.
- You have successfully launched a EC2 Web Server


Task 2: Update your security group and access the web server
- Select your EC2 and in the details section copy the IPv4 Public IP of your instance to your clipboard.
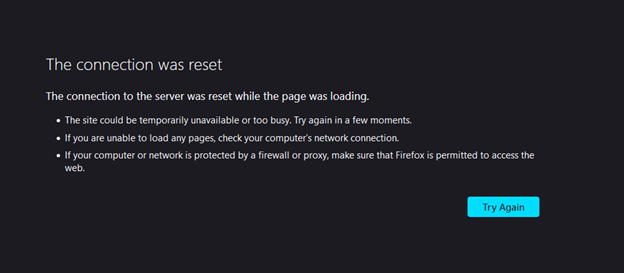
- Open a private tab in your web browser, paste the IP address you just copied, then press Enter.
- Keep the browser tab open, but return to the EC2 Management Console tab.
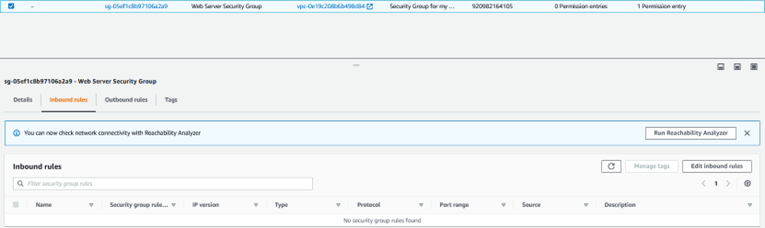
- In the left navigation pane, Under Network & Security, click Security Groups.
- Select Web Server Security Group.
- Click the Inbound rules. The security group currently has no rules.
- Click Edit Inbound rules, then Add rule.
- Type: HTTP
- Source: Anywhere Ipv4
- Click Save rules
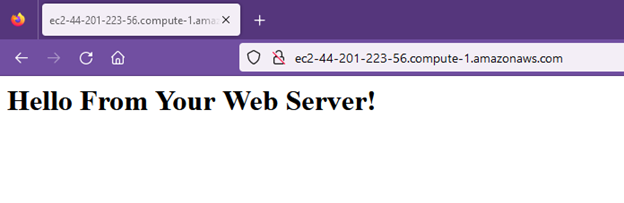
- Return to the web server tab that you previously opened and refresh the page. You should see the message "Hello from Your Web Server."
- You have successfully modified your security group to permit HTTP traffic into your Amazon EC2 Instance.
Note: Are you able to access your web server? Why not? You are not currently able to access your web server because the security group is not permitting inbound traffic on port 80, which is used for HTTP web requests. This is a demonstration of using a security group as a firewall to restrict the network traffic that is allowed in and out of an instance. To correct this, you will now update the security group to permit web traffic on port 80.
Configure:
Task 3: Resize Your Instance: Instance Type and EBS Volume
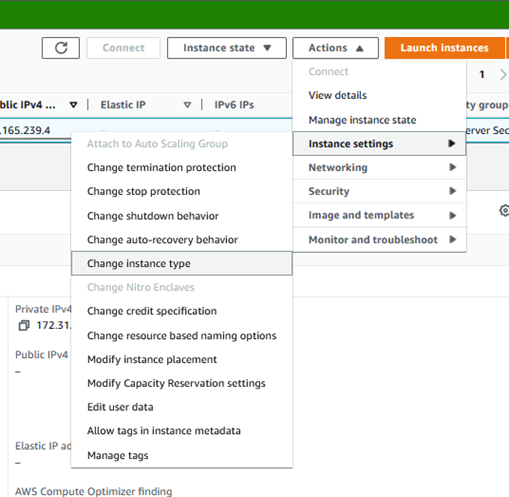
- Open the EC2 Management Console, in the left navigation pane, click Instances. Web Server should already be selected.
- Stop Your Instance: Next to the Actions button, select Instance State then in the menu select Stop Instance.
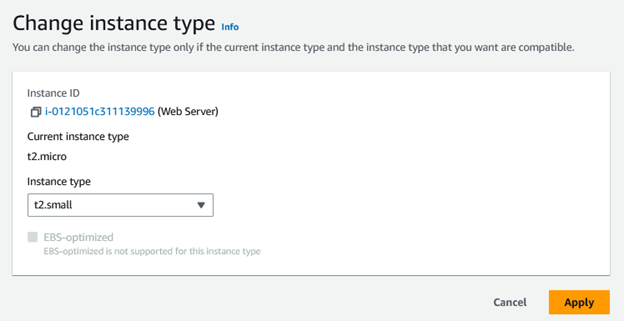
- Change The Instance Type: In the Actions menu, select Instance Settings then Change Instance Type, then configure:
- Instance Type: t2.small
- Click Apply.
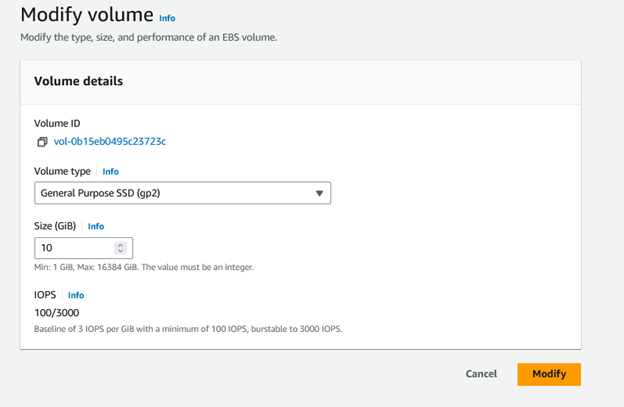
- Resize the EBS Volume: In the left navigation menu, click Volumes.
- Select the Volume then In the Actions menu, select Modify Volume. The disk volume currently has a size of 8 GiB. You will now increase the size of this disk. Change the size to 10 then click Modify.
- Start the Resized Instance: In the left navigation pane, click Instances. select Instance State In the menu, select Start Instance.
- You have successfully resized your Amazon EC2 Instance. In this task, you changed your instance type from t2.micro to t2.small. You also modified your root disk volume from 8 GiB to 10 GiB.
Wait for the Instance State to display stopped.

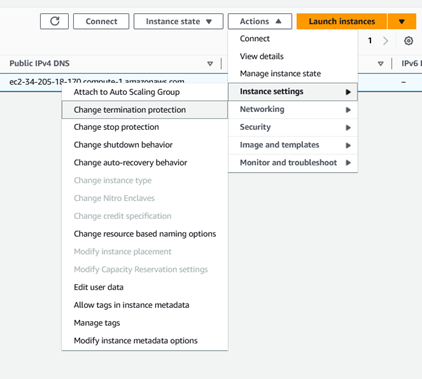
Task 4 Test Termination Protection
- In the left navigation pane, click Instances.
- Select Instance State, then select Terminate Instance.
- Attempt to terminate the instance again.
- Now you have successfully tested termination protection and terminated your instance.
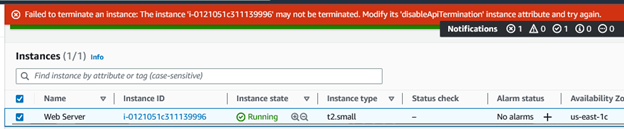
Note: These instances have Termination Protection and will not be terminated. Use the